Leveraging Web-Scraping and AI for Job Market Monitoring
This blog post aims to demonstrate the monitoring and scraping capabilities of Midesk in action. Using the real-world example of career page scraping, we hope to provide a glimpse into how these features can be applied in different scenarios. We’ve chosen to create a tutorial that walks you through the creation of an autonomous, AI-driven job board, focusing on the media industry.
Why Choose the Media Industry?
The media industry experiences high turnover rates and a constant flux of job openings across numerous companies. Having been a part of the Next Media Accelerator, Midesk has firsthand insights into this sector, making it a relevant field to apply our capabilities.
Monitoring job postings in such a dynamic environment can be challenging using traditional methods or conventional software due to rapid changes and the scattered nature of postings.
Moveover, job scraping is typically a technical process that requires a high level of expertise. However, with Midesk’s no-code solution, you can easily automate the process of job scraping and create an AI-driven job board.
The Outcome: An Autonomous, AI-Driven Job Board
This guide will walk you through the process of leveraging Midesk’s features to build an AI-powered job board. This job board will constantly update with new job listings scraped from various media companies, providing a solution to the rapid changes in this sector, while also illustrating the applications of Midesk’s platform.
Curious to see what the final product looks like? Visit the completed job board at karriere.media.
Landing page
In the spirit of providing an intuitive experience for job seekers, this autonomous job board puts essential information and features front and center. From the landing page to the individual job postings, each element aims to streamline the job search process.

To optimize the search process, an inclusive filter system is available on the left side of the screen, enabling users to narrow down the job listings based on:
Filter Options
- Freshness: Keeping up with the newest opportunities, users can locate jobs posted within the last 24 hours or 7 days.
- Companies: Highlighting jobs from chosen companies with an available tally of open positions.
- Roles: Customizing the job search according to preferred roles like content creation, administrative tasks, technology & IT, project management, and more.
- Locations: Providing location-based filters for job postings.
- Education: Allowing users to filter job openings by required educational credentials.
- Level: Filtering job listings based on experience levels: mid-level, internship, entry level, associate, or senior level positions.
- Work Arrangement: Selecting jobs based on desired work settings: on-site, hybrid, or entirely remote.
- Employment Type: Specifying the type of employment desired, such as full-time, part-time, or freelance.
Main Content Area
The central content area offers a view of the latest job postings, with the most recent opportunities given precedence. Each job listing includes essential details like job title, hiring company, job location, and posting date. Clicking on a job listing provides access to the job posting detail page.
Job posting detail page
The job posting detail page provides an in-depth look into each job opportunity.
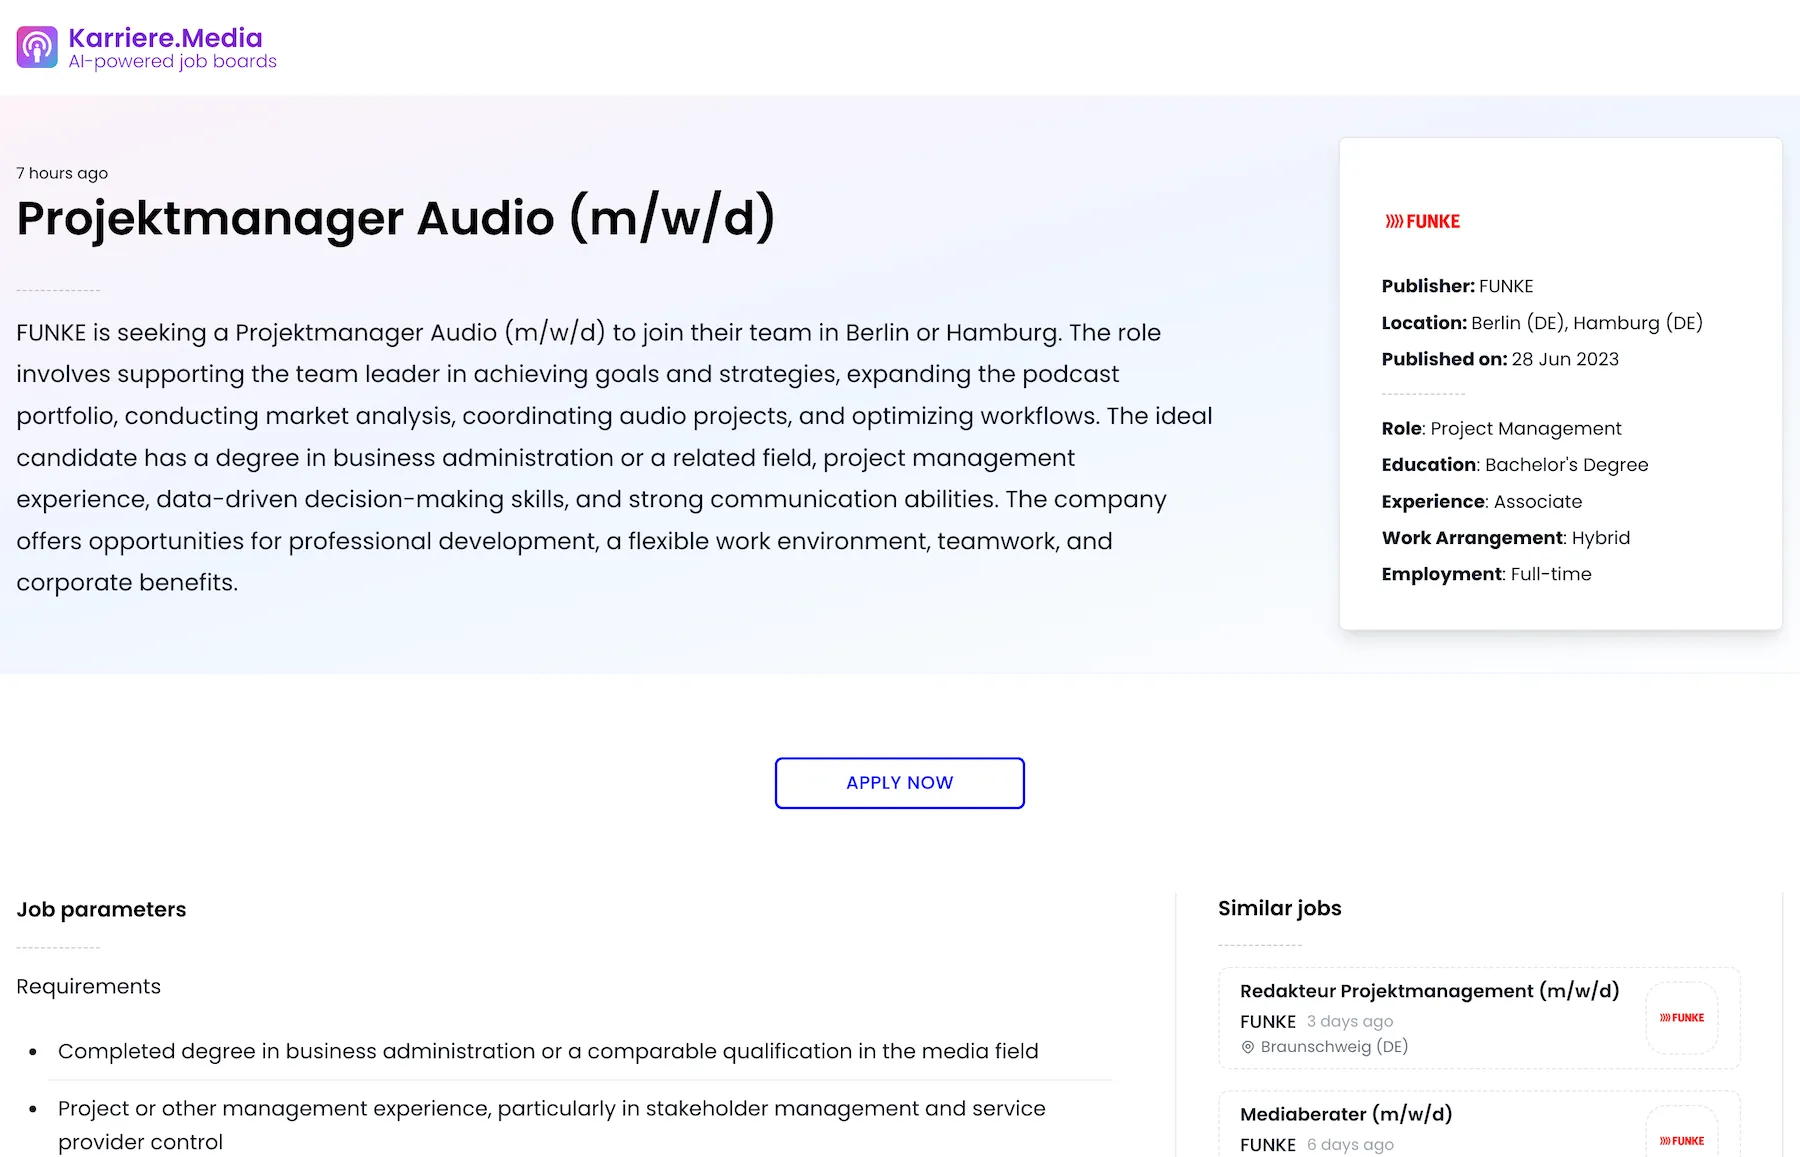
At the top of the page, you’ll find the time since the job was posted, the job title, and an AI-generated summary of the job role.
Further on the right side of the hero section, an AI classification of the job is available, which is also utilized in the job filters.
Below that, AI-extracted role responsibilities, benefits, and requirements offer a thorough understanding of the job’s specifications and the company’s offerings.
Finally, the page includes a section for similar jobs. These are AI-grouped based on vector embeddings, offering alternative job opportunities.
Architecture
Before diving into the tutorial, let’s take a moment to understand the architectural framework that underlines the first part of the tutorial:
%%{init: {'theme':'neutral', "flowchart" : { "curve" : "linear" }}}%%
  flowchart TD
      subgraph "External"
          direction TB
          CareerPage[Career Page]
          CareerDetails[Job posting]
      end

      subgraph "Midesk Platform"
          direction TB
          MonitoringJob -->|Called to| CareerPage
          CareerPage -->|Bundled as data from| Tasks[Monitoring Tasks]
          Tasks --> Steps[Extraction Steps]
          Steps -->|Requested by| CareerDetails
          CareerDetails -->|Summary provided by| Tasks
          Steps -->|Converted into| Articles[Articles]
          Articles -->|Retrieved via| API[Midesk API]
      end
Getting Started: Essential Preparation for Your AI-Driven Job Board
Before diving into creating our AI-driven job board, there are some key preparatory steps we need to take to set a solid foundation:
Gathering the URLs of Career Pages
Begin by collecting the URLs of the career pages from your media companies of choice. These URLs will be the primary data sources, supplying a continuous feed of job postings.
| Company Name | Career Page URL |
|---|---|
| FischerAppelt | FischerAppelt |
| dpa | dpa |
| Zeit Verlagsgruppe | Zeit Verlagsgruppe |
| Handelsblatt Group | Handelsblatt Group |
| Funke Mediengruppe | Funke Mediengruppe |
| Berliner Verlag | Berliner Verlag |
| Wort & Bild Verlag | Wort & Bild Verlag |
| Schwartz PR | Schwartz PR |
Familiarizing Ourselves with the Career Pages (Using FischerAppelt as an Example)
To effectively monitor and scrape a career pages, understanding their structure is key. For instance, if we take a look at the FischerAppelt page, we can see that all job postings adhere to the same structure (html enclosed below), with more postings becoming visible as we click the “Mehr laden” button.

If we right-click on a job and inspect the console, we come across valuable job details. These include the job title, company name, job locations, and a link to the detailed job page. While the job summary isn’t available at this stage, we can easily retrieve it from the job details page later.
<a class="sc-fzqBZW jobTeaser__link" href="/jobs/senior-consultant-m-w-d-2">
  <div class="jobTeaser__wrapper">
    <p class="sc-fzoLag jobTeaser__companies">fischerAppelt, advisors</p>
    <h2 class="sc-fzoLag gezNPl">
      <span><span class="typography__highlight">Senior Consultant</span> (m/w/d)</span>
    </h2>
    <div class="jobTeaser__locations">
      <div class="sc-fznMAR fXVIXj jobTeaser__tags">
        <p class="sc-fzoLag tags__tag">Hamburg Headquarter</p>
        <p class="sc-fzoLag tags__tag">Köln</p>
        <p class="sc-fzoLag tags__tag">München</p>
      </div>
    </div>
    <span class="jobTeaser__link-text">Details</span>
  </div>
</a>
Setting Up Your Midesk Account
Step 1: Becoming a Midesk User (for new users)
Are you new to Midesk? Not a problem at all! Signing up is simple and quick. Just visit https://account.midesk.co/ and register using your social account.
With your account ready, we’re all set to gear up Midesk to monitor and scrape job data from the URLs we’ve collected. Here’s a step-by-step guide to help you navigate this process:
Step 2: Add a Monitoring Job
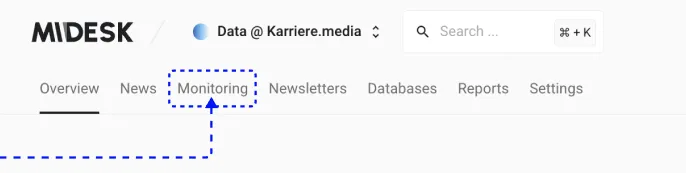
Once you’re in the Midesk dashboard, navigate to the “Monitoring” section.
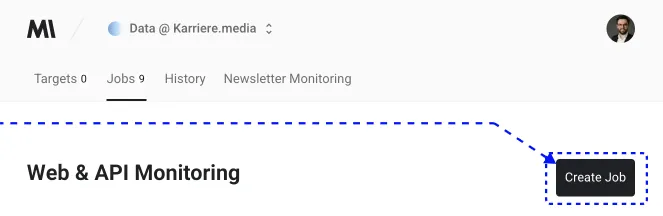
Click on the Create a Job button.
Choose the Web Crawler Monitoring Recipe from the options.

Step 3: Connect Career Pages
At this point, we’re going to connect the career pages to the monitoring job, using the URL we’ve prepared. If necessary, Midesk’s pagination feature will allow us to scrape multiple pages or loads of job postings - as we’ll see in our FischerAppelt career page example.
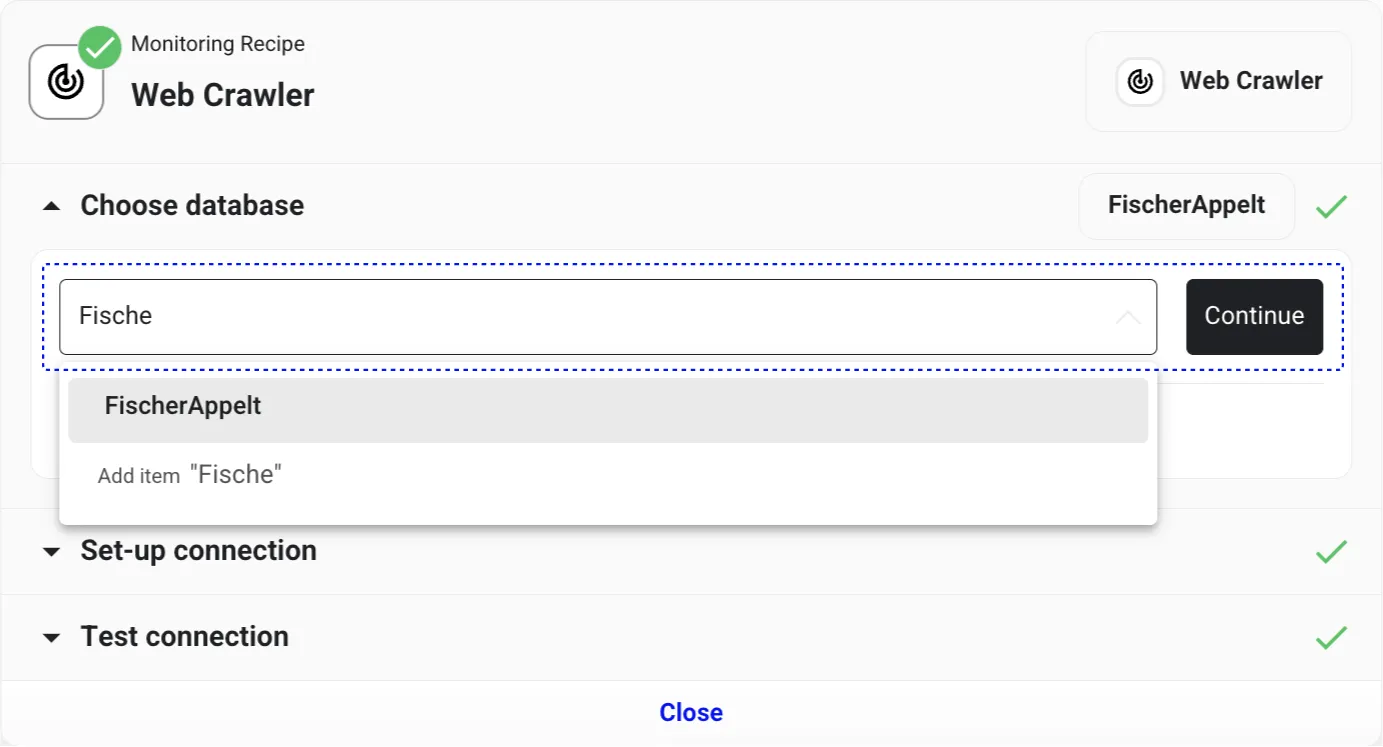
Choose default database
Our first step is to designate a default database for storing the raw data. Enter “fischerAppelt” in the field and click “Add item” to create the database. Once done, validate the database by clicking “Continue”.
Input the Career Page URL
Now, we need to provide the URL for the FischerAppelt career page. Enter https://www.fischerappelt.de/karriere/jobs into the Public URL field and then click “Validate”.

Test the Data Connection
We’ll now confirm that we’re capturing the right data. Click the “Test connection” button and wait for the test to complete. If successful, we’ll see a preview of the data set to be scraped.
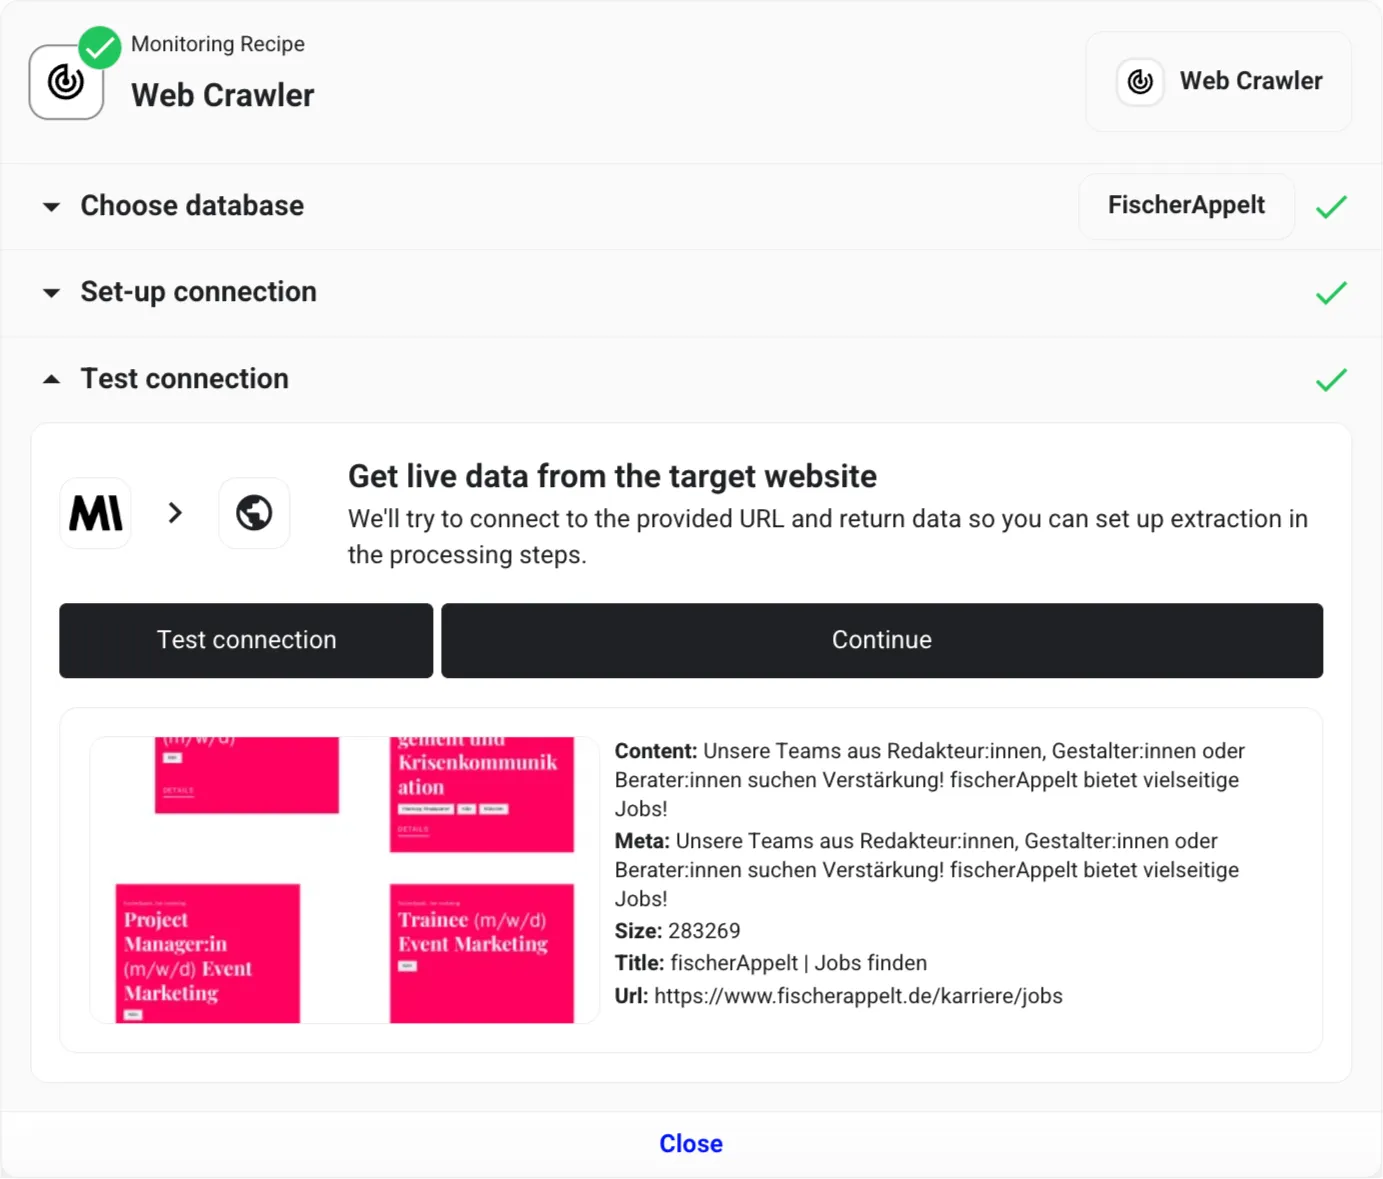
The results should include a screenshot preview and basic page information, such as title and metadata.
If the website you’re scraping presents challenges, consider selecting the Web Crawler (Proxy) Monitoring Recipe in the first step. This recipe employs a proxy to scrape the website, aiding in overcoming any anti-scraping measures that may be in place.
Step 4: Configuring Monitoring Tasks
To identify and extract links to job postings, we will set up monitoring tasks within Midesk. We will use one Monitoring Task that will encompass two Processing Steps.
- The first Processing Step employs xPath to identify all job postings.,
- The subsequent Processign Step will utilize a predefined Midesk template for structured extraction (e.g., source name, title, location, summary).
Setting-Up the First Processing Step
In this initial Processing Step, we’ll use xPath to find all job postings.
To briefly explain, xPath is a technique to identify elements on a page. It’s a potent method for extracting data from websites. If you’re unfamiliar with xPath, the Chrome extension SelectorGadget to can assist in finding the correct xPath expression.
In our example, as we’re interested in all job postings on the page, we will use the xPath expression //a[contains(@class, "jobTeaser__link")]. We’ll also enable “xPath - multiple elements” to retrieve all elements that match this xPath expression.
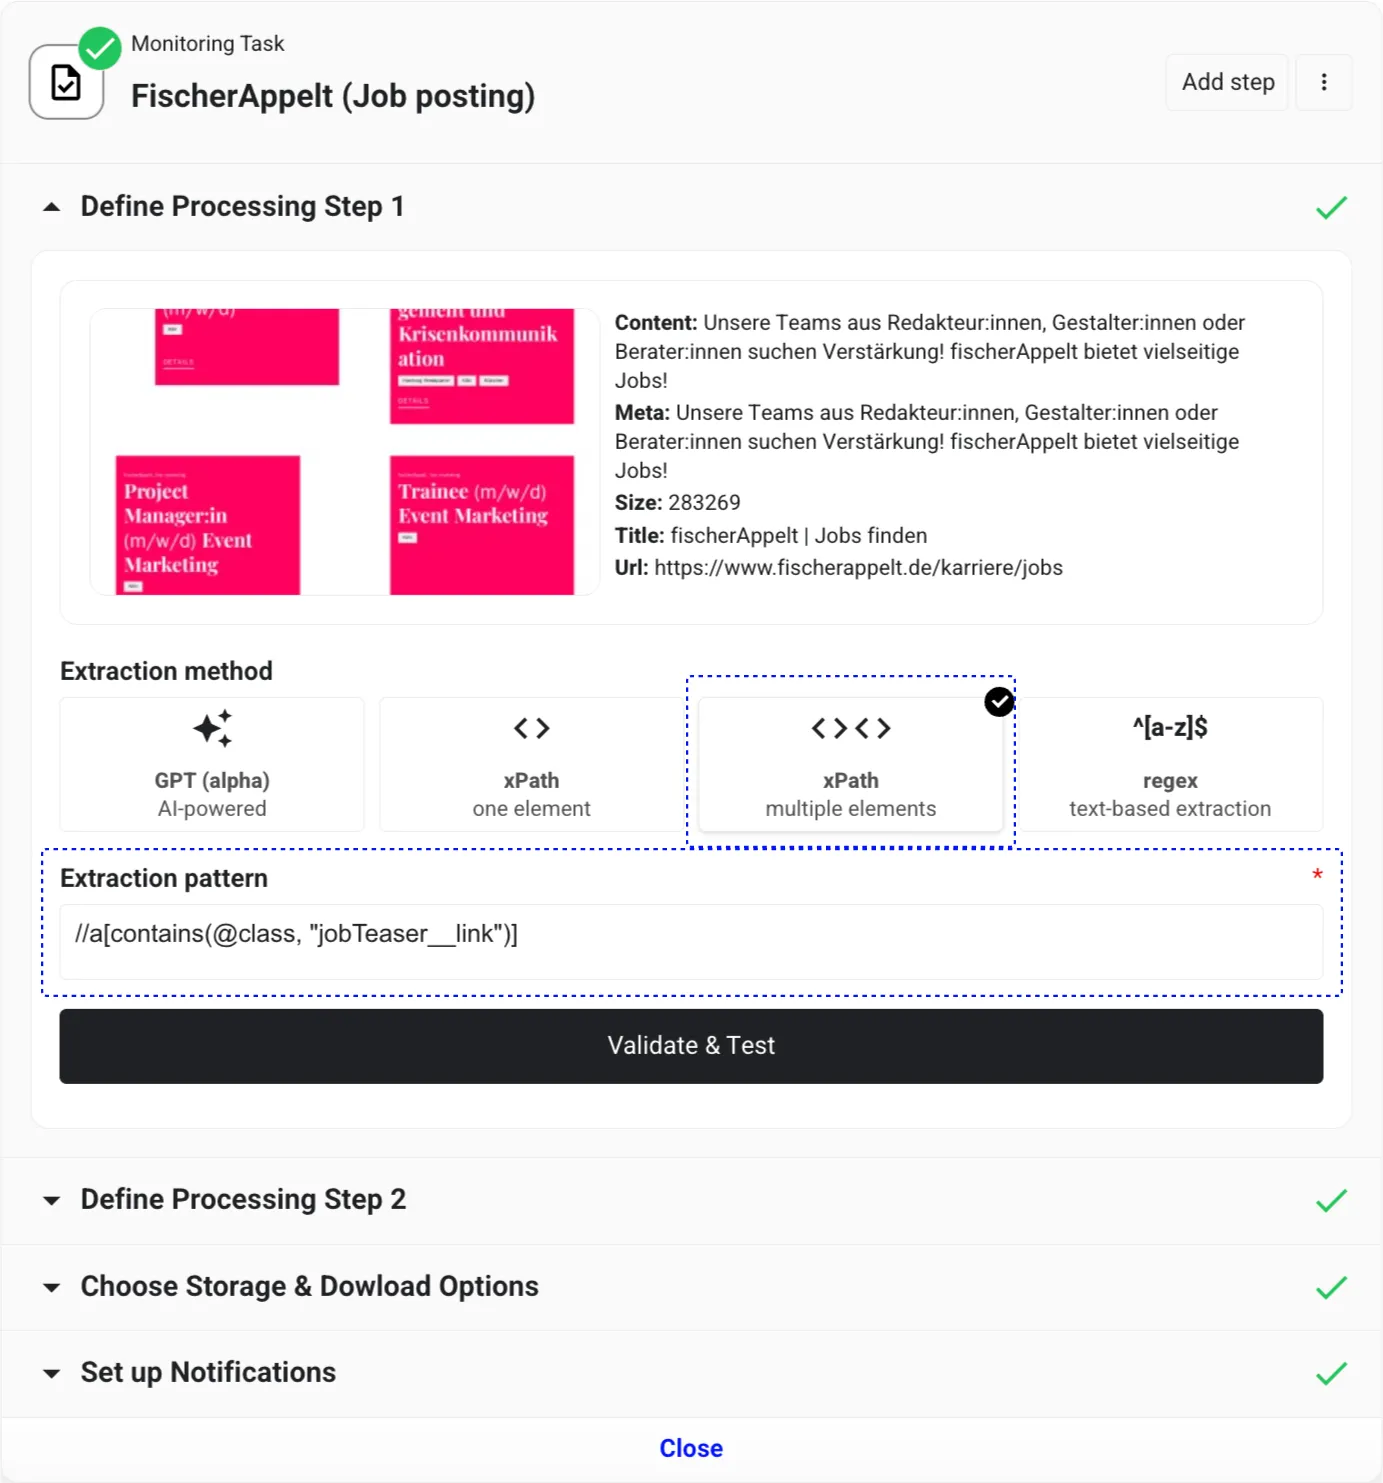
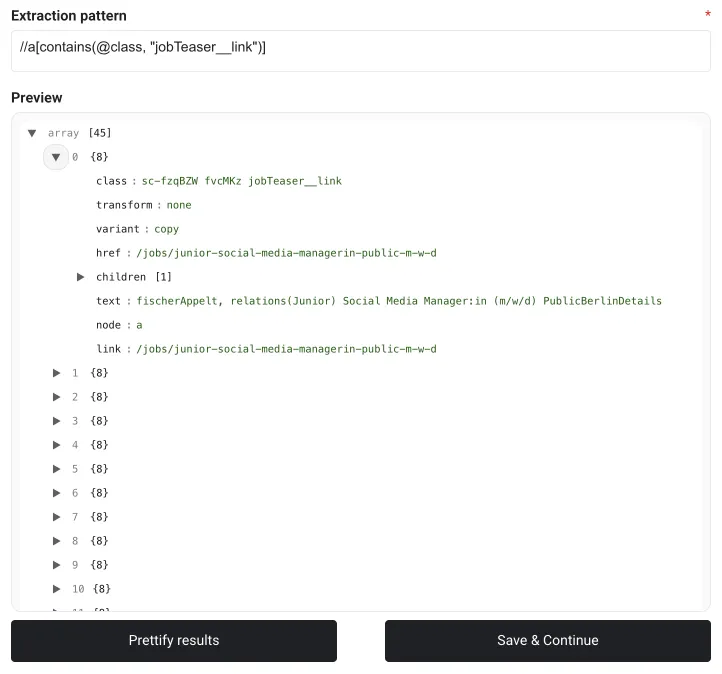
After completion, click Validate & Test to confirm the xPath expression and acquire data to use in the subsequent step.
This will return HTML in a JSON format, which includes helpful keys, such as the link. We’ll now transform all this data into a structured format suitable for our job board in the next Processing Step. To create a new Processing Step, click on Prettify results (or Add step in the top right corner).
Setting-Up the Second Processing Step
In this stage, we will use a predefined Midesk template to scaffold the desired fields we will use across the other job boards (e.g., source name, title, location, summary). Navigate to the bottom right corner of the preview window and click the menu icon, then select Job posting. This action populates the processing step with a template designed for job postings.
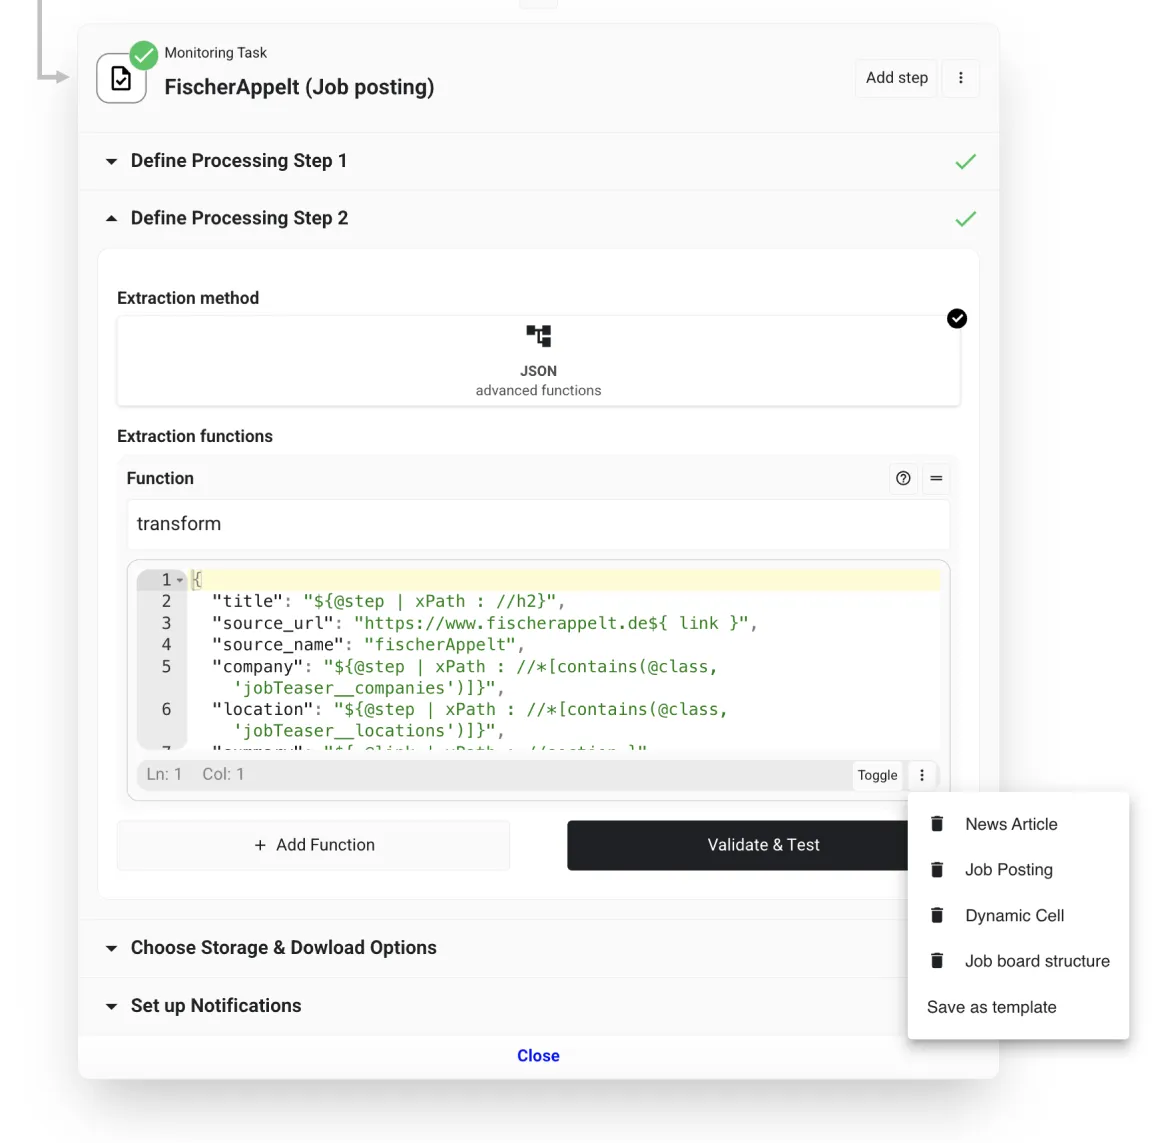
Here are the values to use::
{
  "source_name": "fischerAppelt",
  "source_url": "https://www.fischerappelt.de${ link }",
  "title": "${@step | xPath : //h2}",
  "company": "${@step | xPath : //*[contains(@class, 'jobTeaser__companies')]}",
  "location": "${@step | xPath : //*[contains(@class, 'jobTeaser__locations')]}",
  "summary": "${ @link | xPath : //section }",
  "published_on": "${ @link | xPath : //time }"
}
What does the Midesk Syntax Mean?
Midesk Syntax (Midesk Docs - Processing Steps) is a powereful templating language that allows you to extract data from HTML using xPath and other methods. In a nutshell, the above syntax means:
- Static values, such as the value of
source_nameare always the same. ${}syntax is part of Midesk’s templating language, allowing you to extract data from HTML using xPath and other methods.- The
@stepvariable sets the context to the provided HTML from the previous step. - The
@linkvariable sets the context to the current link. It will download the underlying job posting page (based on the link provided in any other key) and extract data from there. This is particularly useful when you need to extract data from the job posting page itself, such as the summary or published date.
- The
- The value of source_url is a combination of a static value and a dynamic value. The static value is
https://www.fischerappelt.deand the dynamic value is the link from the previous step (${ link }). This results in a full URL leading to the job posting page..
Remember that xPath is a pipeline method. Midesk provides several methods that can manipulate variables and data provided by the previous step. In this instance, the pipe method (xPath) is used to set the context to the HTML from the previous step. You can find more details about the pipe method Midesk Docs - Processing Steps.
Step 5: Conver to Articles
Finally, you’ll want to create a new Data Type. Type “Job posting” into the Data type field, press enter and select the JSON value type to store complex values.
Finally, ensure that the “Forward Download” toggle is enabled - this is a key signal to the system to download job postings in a structured manner. Optionally, you can select a news channel at this stage.
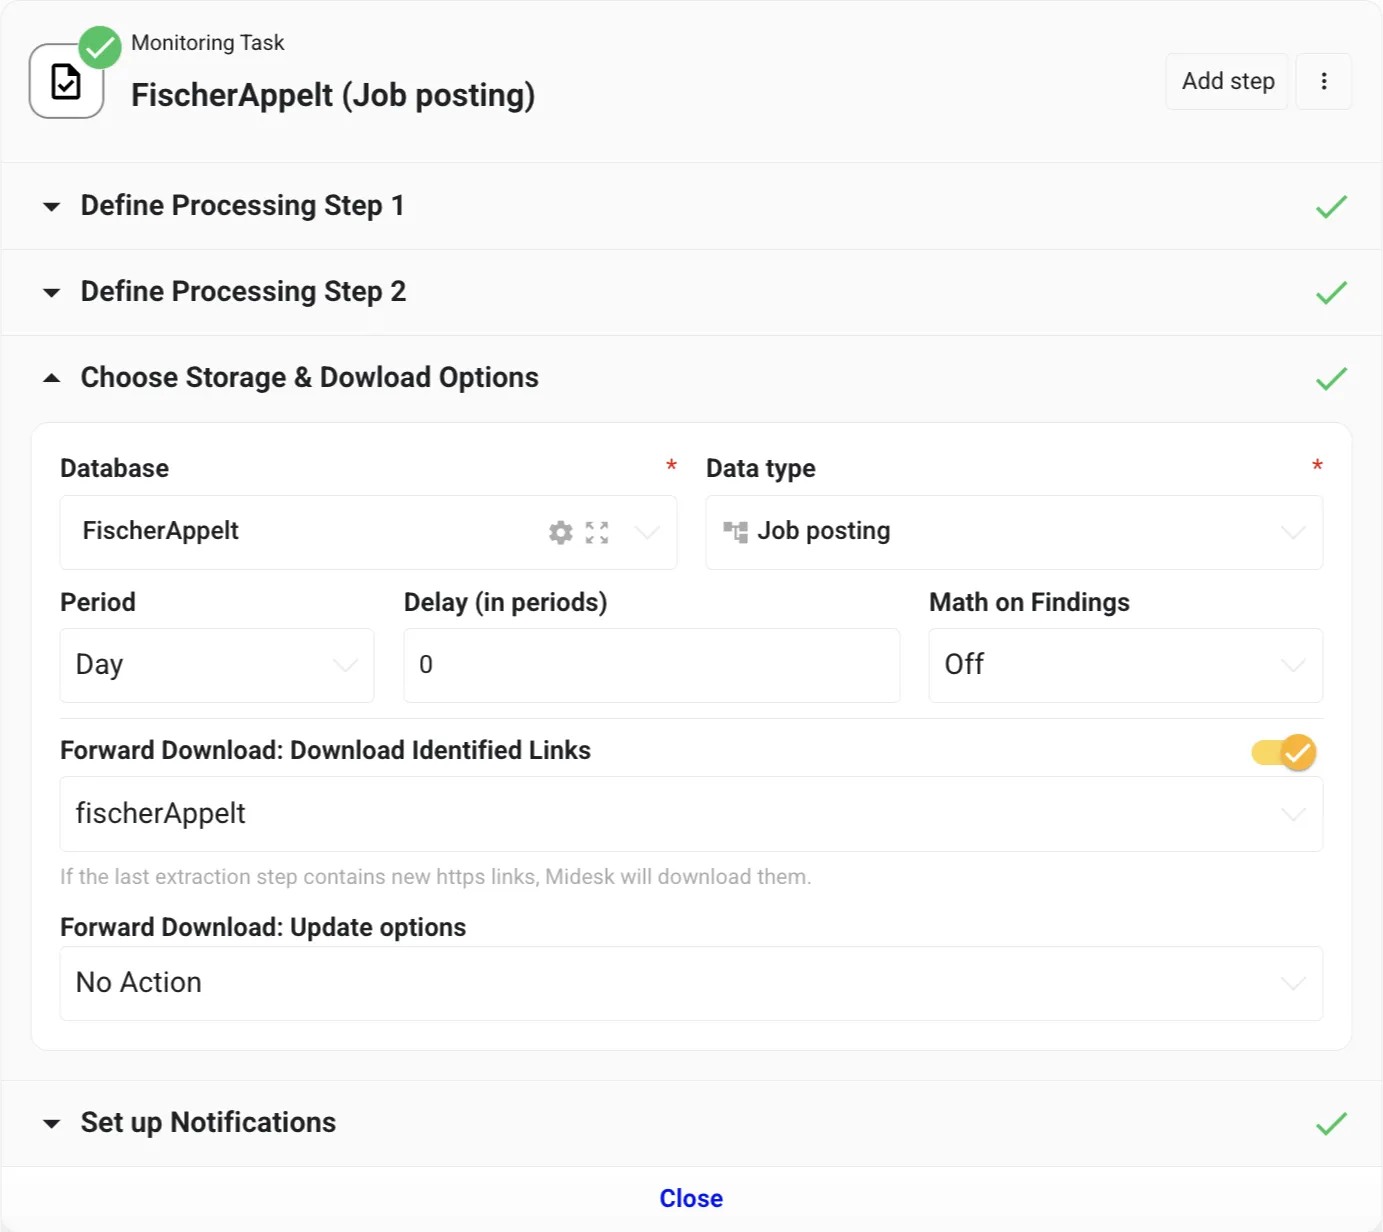
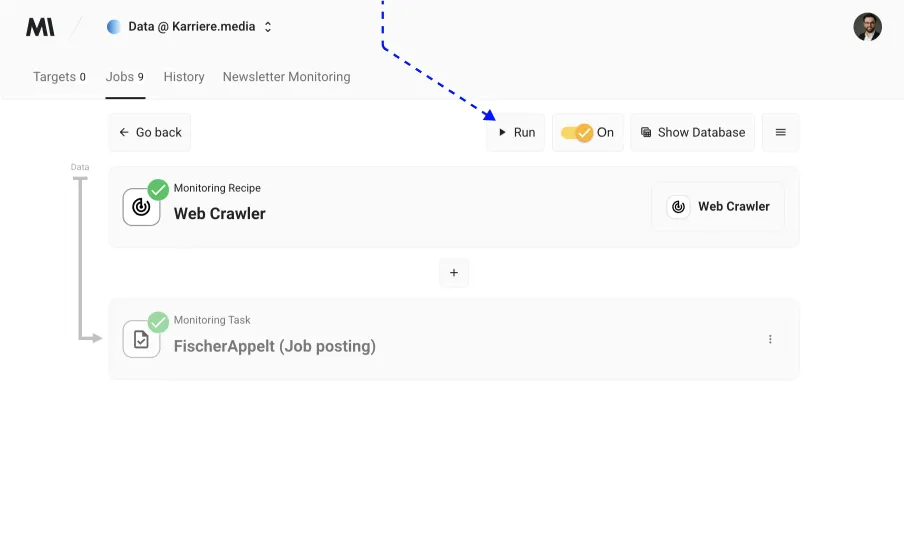
And voilà! Your setup is complete. Now, all you need to do is wait for Midesk’s scheduler to take over the monitoring job, or if you’re as eager as we are, click “Run” to kickstart the process immediately.
Job postings
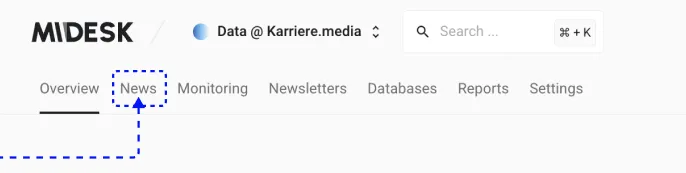
Once the job postings are downloaded, you’ll find them neatly categorized in the News section of Midesk. To preview the data, navigate back to the dashboard (click on the Midesk logo in the top left corner) and select “News.”
This is where you will see all the job postings that were downloaded.
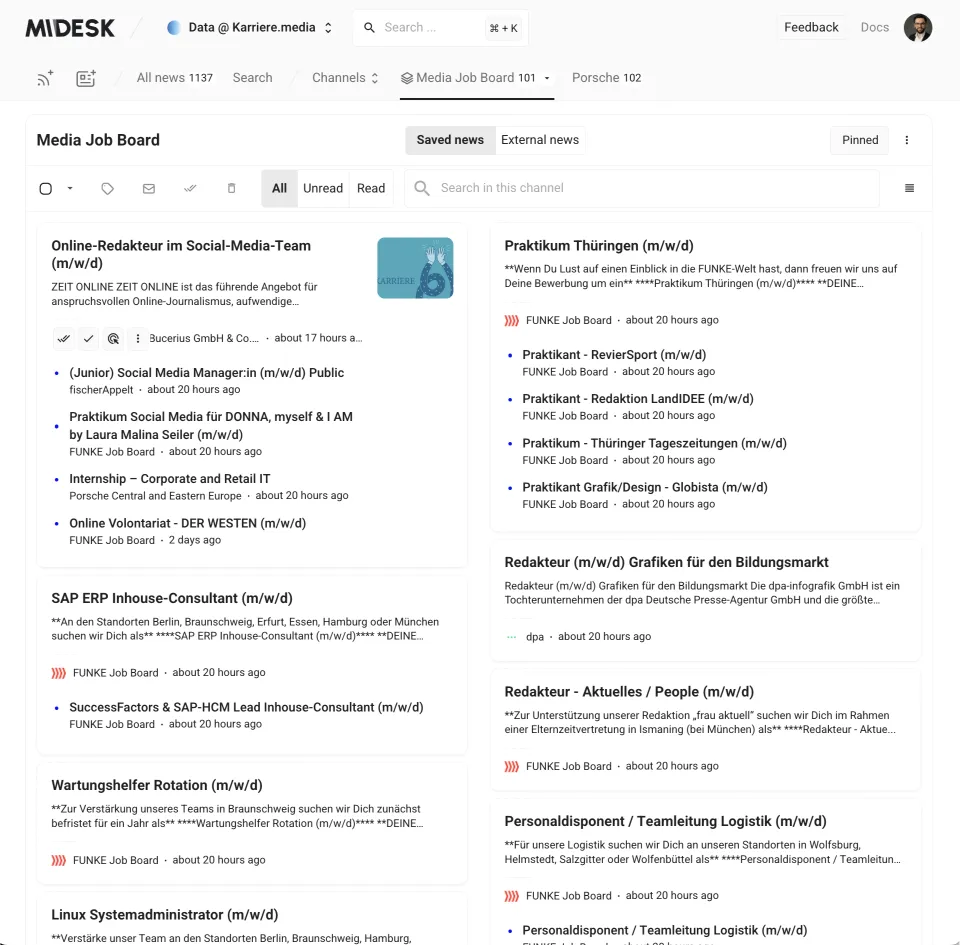
Feel free to click on any of these postings to access the full details of the job.

With these steps, you are now all set to automatically monitor job postings from any website. You can also use this setup to monitor job postings from the other career pages. Simply repeat the steps above for each website you want to monitor.
Getting data via API
Now that Midesk is hard at work collecting data, it’s time to harness this information and incorporate it into your own application. This can be efficiently done by setting up an API connection with Midesk.
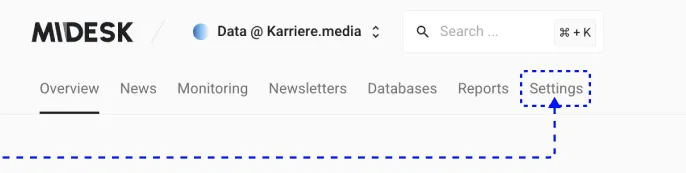
Step 1: Generate an API Key
Your first step within Midesk involves generating an API key. This key will grant you access to the collected job postings data. To get started, navigate to “Settings”.
Then, go to the API Keys tab and click on the “Create” button.
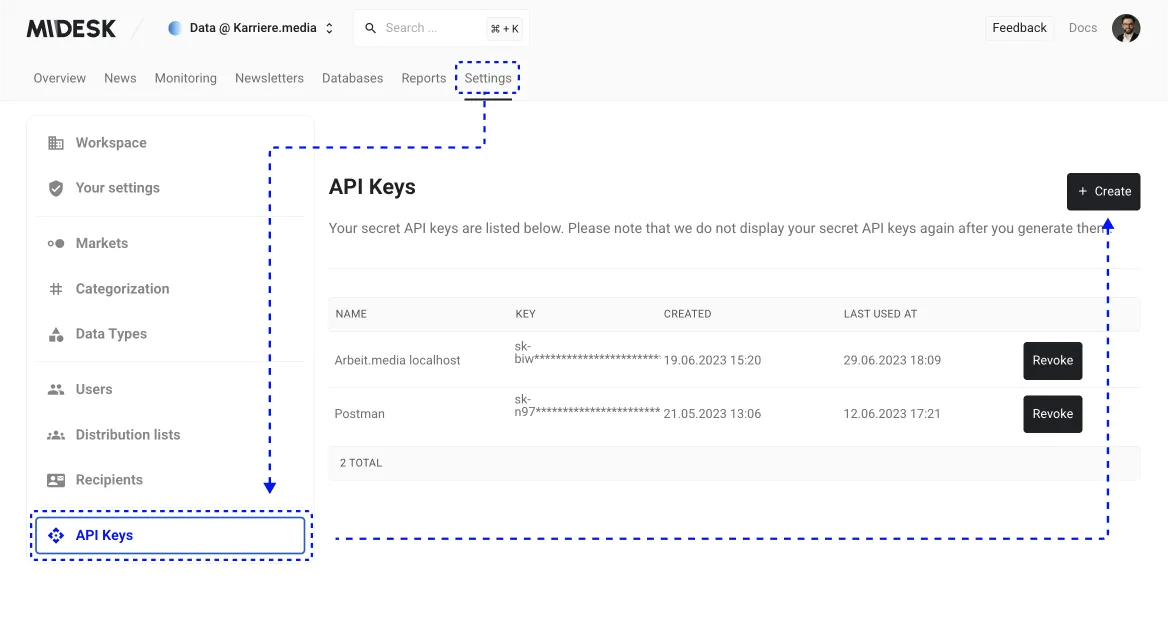
This action will generate the API key needed to access your scraped job postings data. Keep in mind, this API key will only be displayed once, so ensure you copy and store it securely for future use.
Step 2: Test the API in Postman
To ensure smooth integration, test the API using a tool such as Postman. Here, you’ll be making requests to fetch the job postings data from Midesk. To begin, create a new request in Postman with the following parameters:
- Request URL:
https://api.midesk.co/api/v1/search - Request Method:
GET
Next, append the following headers to your request:
- api-key: pk-…
- Content-Type: application/json
Once done, hit the “Send” button to make the request. If all goes well, you’ll receive a response with a detailed list of job postings. For simplicity, we’ve truncated the list below to only show the first job posting.
{
  "data": [
    {
      "id": "13359262438425123693",
      "title": "(Junior) Social Media Manager:in (m/w/d) Public",
      "image": "https://www.fischerappelt.de/uploads/images/  (truncated in tutorial)",
      "kind": "crawled",
      "language": "de",
      "source_name": "fischerAppelt",
      "source_url": "https://www.fischerappelt.de/jobs/junior-social-media-managerin-public-m-w-d",
      "unread": true,
      "summary": "Für unser Public-Team suchen wir ab sofort eine:n (Junior) Social (truncated in tutorial)",
      "location": "Berlin",
      "published_on": "2023-06-29 00:00:00",
      "created_at": "2023-06-29T12:00:59.000000Z",
      "updated_at": "2023-06-29T12:01:30.000000Z",
      "metadata": {
        "company": "fischerAppelt, relations",
        "summary": "${ @link | xPath : //section }",
        "published_on": "${ @link | xPath : //time }"
      }
    }
  ]
}
Conclusion
We’ve made significant strides! We’ve successfully automated a system that diligently scrapes job postings from handpicked media companies’ career pages, transforming them into structured data. The data is made readily accessible through our API.
But we’re just getting started! In the upcoming second tutorial, we’ll delve into how to consume the API in a Laravel application. Here, we’ll build a comprehensive job board that ingeniously leverages the scraped data. Expect to uncover how to set up a Laravel scheduler, manage API data in Laravel, and render job postings on the job board with finesse and ease. We will also look at how to set-up pgvector on Laravel Vapor to store vector embeddings for comparing similarity. We will also touch upon how to automatically classify, summarize and extract information from the job postings via Laravel Queues.
So, don’t miss the upcoming post! Stay with us on this journey, and happy coding!
For deeper insights and guidance, consider exploring these additional resources:
- Midesk API Documentation
- Reach out to us on LinkedIn